Introduction to Performance Exhaust Systems
If youre looking to boost your car’s power, improve its sound, or simply add a custom touch, installing a performance exhaust system is a great place to start. But what exactly is a performance exhaust? In short, it’s an aftermarket upgrade designed to replace your vehicle’s stock exhaust components for better airflow and efficiency. These systems are popular among car enthusiasts in the U.S. because they help engines “breathe” easier, which can translate into more horsepower, improved throttle response, and even better fuel economy in some cases.
Beyond the technical perks, many drivers love the deep, aggressive sound a new exhaust brings—turning heads at every stoplight. Upgrading from a stock exhaust can also reduce weight and add a sporty look underneath your ride. Whether you want that classic rumble or just want to squeeze out a few extra ponies under the hood, knowing how to install a performance exhaust system can save you money and give you real hands-on satisfaction. Let’s dive into why so many Americans make this upgrade and how you can do it yourself with the right tools and guidance.
2. Tools and Materials You’ll Need
Before you get your hands dirty, it’s important to gather all the tools and materials you’ll need for installing a performance exhaust system. Using the right equipment not only makes the job easier but also helps prevent damage to your vehicle or new parts. Here’s a handy checklist of essentials you should have on hand, along with some practical tips for choosing quality parts that work well with U.S. vehicles.
Essential Tools & Equipment
| Tool | Purpose | Pro Tip |
|---|---|---|
| Socket Set (SAE & Metric) | Removing and tightening bolts/nuts | Choose deep sockets for hard-to-reach areas |
| Wrench Set (SAE & Metric) | Loosening/tightening connections | Ratcheting wrenches save time under the car |
| Jack & Jack Stands/Ramps | Lifting and securing your vehicle safely | Rated for your car’s weight; never use just the jack alone |
| Pry Bar | Removing stubborn hangers or old exhaust parts | Cushioned grip for comfort is a plus during tough jobs |
| WD-40 or Penetrating Oil | Loosening rusted bolts and joints | Saves time, especially on older vehicles exposed to road salt |
| Torque Wrench | Tightening bolts to manufacturer specs | Prevents overtightening and exhaust leaks |
| Sawzall or Exhaust Pipe Cutter (if needed) | Cutting old exhaust sections for removal | A metal-specific blade ensures clean cuts without fraying pipes |
| Safety Gear (Gloves, Eye Protection) | Protecting yourself from debris and burns | Nitrile gloves resist chemicals; ANSI-rated glasses are best |
| Rubber Mallet/Hammer | Tapping pieces into place without damage | Avoids denting new pipes compared to a steel hammer |
| Exhaust Hanger Removal Tool (optional) | Makes removing rubber hangers much easier | A worthwhile investment if you plan on doing more installs in the future |
Main Materials You’ll Need
- Performance Exhaust Kit: Choose a kit specifically designed for your make, model, and year—universal kits can fit, but bolt-on kits made for U.S. vehicles often require less modification.
- Gaskets & Hardware: Always use new gaskets and high-quality stainless hardware to avoid leaks and corrosion.
- Exhaust Clamps: Go for heavy-duty clamps that match your pipe diameter, preferably stainless steel for longevity.
- Muffler Sealant (optional): Helps prevent leaks at connections, especially if you’re working with slip-fit joints.
Choosing Quality Parts for American Vehicles
- Buy from Reputable Brands: Look for trusted names like MagnaFlow, Flowmaster, or Borla—these brands engineer systems specifically for popular U.S. cars and trucks.
- Check Local Regulations: Some states like California have strict emissions laws. Make sure your exhaust system is 50-state legal if necessary.
- Select Stainless Steel: For durability against road salt and harsh American winters, opt for 304 or 409 stainless steel over aluminized steel.
Your Next Step:
With these tools and materials ready, you’ll be fully prepped to tackle your performance exhaust install—saving time, avoiding hassle, and setting yourself up for success!
![]()
3. Preparation and Safety Tips
Before you grab your tools and dive under your car, it’s crucial to set yourself up for a safe and successful installation. Here are the key steps every DIYer should follow before starting work on a performance exhaust system:
Prep Your Workspace
Choose a flat, level surface—like your driveway or garage—to work on. Make sure there’s enough room around the vehicle for you to move freely. Keep your workspace well-lit and free of clutter to avoid any tripping hazards.
Prepare Your Car
- Allow your car’s exhaust system to cool down completely before touching it. Exhaust pipes can stay hot long after driving.
- Raise your vehicle using a jack and secure it with jack stands placed under the manufacturer’s recommended lift points. Never rely solely on a hydraulic jack!
- Disconnect the battery to eliminate any risk of electrical shorts while working near wiring or sensors.
Gather Safety Gear
- Wear safety glasses to protect your eyes from debris, rust, or metal shavings.
- Use mechanic gloves to shield your hands from sharp edges and hot surfaces.
- If you’re working indoors, make sure the area is well-ventilated since exhaust fumes can be hazardous.
Double-Check Your Tools and Parts
Laying out all necessary tools—like ratchets, sockets, penetrating oil, and replacement gaskets—before you start will help keep things running smoothly. Check that your new exhaust system matches your vehicle’s make and model for a hassle-free install.
Take Your Time
Rushing through prep work is one of the most common causes of accidents or mistakes in DIY projects. Prioritizing safety and preparation not only protects you but also helps ensure a cleaner, more professional final result.
4. Removing the Stock Exhaust System
Before you can install your new performance exhaust, you need to safely remove the factory-installed system. This process might seem intimidating, but with the right tools and a little patience, it’s totally doable—even for beginners. Follow these step-by-step instructions to get the job done without damaging your vehicle or the new parts.
Step-by-Step Removal Instructions
- Lift Your Vehicle Safely: Use a hydraulic jack and secure the car with jack stands on a level surface. Never rely solely on a jack! Double-check that your vehicle is stable before working underneath.
- Let Everything Cool Down: Exhaust parts get extremely hot, so make sure your car has been off and cooling for at least 30 minutes before you start wrenching.
- Spray Penetrating Oil: Generously apply penetrating oil (like WD-40) to all bolts and clamps along the exhaust system. Let it soak in for 10-15 minutes—this will help loosen any rusted or stubborn hardware.
- Disconnect Oxygen Sensors: If your exhaust has O2 sensors, carefully disconnect them using an O2 sensor socket. Label the connectors so you remember where they go later.
- Loosen Bolts and Clamps: Using a ratchet or breaker bar, remove the bolts at the flanges and clamps holding the exhaust sections together. Start from the rear (muffler) and work toward the front (catalytic converter).
- Remove Exhaust Hangers: Support each section of the exhaust with one hand while sliding it out of its rubber hangers using pliers or a pry tool. Be careful—older exhausts can be heavy and awkward!
- Lower and Remove Each Section: Carefully lower each piece of the old system to the ground. Watch for sharp edges and avoid bending heat shields or undercarriage components.
Common Mistakes to Avoid
| Mistake | How to Avoid It |
|---|---|
| Not letting exhaust cool down | Always wait at least 30 minutes after driving before starting removal. |
| Stripping bolts or breaking studs | Saturate with penetrating oil and use the correct size tools. |
| Damaging oxygen sensors | Use proper sockets and disconnect gently; never yank wires. |
| Losing track of hardware | Keep bolts, nuts, and hangers organized in labeled containers. |
| Poor vehicle support | Double-check jack stand placement; never work under an unstable car. |
Quick Tips for a Smooth Removal Process
- If bolts are extra rusty, use heat from a small torch for easier removal—but keep a fire extinguisher handy just in case.
- Take pictures before you start. This helps when routing new pipes later.
- If you encounter stuck hangers, lubricate with silicone spray for easier removal.
- Don’t rush! Rushing leads to mistakes like stripped threads or damaged sensors.
You’re now ready for installation! With your stock exhaust out of the way, it’s time to move on to fitting your shiny new performance system—and enjoying that custom sound and extra power boost!
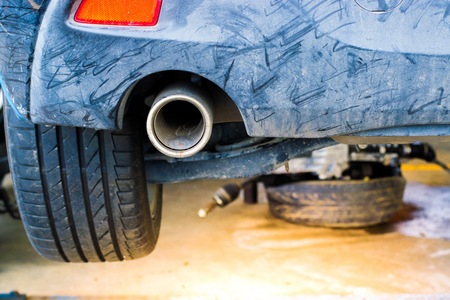
5. Installing the Performance Exhaust System
Now that your old exhaust is out of the way and you’ve prepped everything, it’s time to install your new performance exhaust system. Here’s a step-by-step breakdown to make sure you get a tight, rattle-free fit:
Step 1: Dry Fit Your System
Before tightening anything, loosely assemble all parts of the new exhaust under your vehicle. This “mock-up” helps you see how everything lines up and ensures you’re not missing any hardware or gaskets. Make adjustments now—trust us, it’s easier than after bolts are torqued down!
Step 2: Start from the Front
Begin attaching the exhaust at the front (engine side), working your way toward the rear. This usually means connecting to the catalytic converter or downpipe first. Use new gaskets if provided, and hand-tighten bolts so you can tweak alignment as needed.
Step 3: Secure Hangers and Brackets
As you go, slide each section’s hangers into the factory rubber mounts. If your kit came with new mounts or bushings, swap them in for extra durability and reduced vibration. Double-check that no part of the system touches the chassis—this prevents annoying rattles later on.
Pro Tip:
If a pipe is tough to line up, use a little WD-40 on the hangers or gently adjust nearby sections before tightening clamps. Don’t force anything—good fitment now means fewer headaches later.
Step 4: Tighten Everything Up
Once every section is in place and aligned, start tightening all clamps and bolts from front to back. Use a torque wrench if you have one; over-tightening can warp flanges while under-tightening leads to leaks. Check your kit’s instructions for recommended torque specs.
Step 5: Final Adjustments
Give your exhaust a gentle shake by hand—there should be a little give but no major movement. Ensure there’s at least half an inch of clearance between pipes and heat-sensitive parts like brake lines, fuel tanks, or the floorpan.
Double-Check Before Firing Up!
It’s worth spending an extra few minutes here to check every bolt and connection again. A careful installation means better performance, less noise, and longer life from your new system.
6. Double-Checking and Troubleshooting
Now that you’ve bolted on your performance exhaust system, it’s time to make sure everything is dialed in for safety, reliability, and the best sound. Here’s how to inspect your installation and handle common issues, especially those typical with American cars.
Inspect for Leaks
Start the engine and let it idle. Listen closely around the joints and connections. If you hear a ticking or hissing sound, there may be an exhaust leak. To double-check, carefully run your hand (without touching any hot surfaces) near the flanges and gaskets—you might feel escaping air. You can also spray soapy water on these areas; bubbles will indicate a leak. Tighten bolts as needed, or reposition gaskets if necessary.
Check for Rattles and Vibration
While the car is idling, gently rev the engine and listen for rattling noises underneath. Common trouble spots include heat shields, hangers, or anywhere the exhaust could be touching the chassis or suspension components. If you spot a rattle, adjust the hangers or use exhaust clamps with rubber isolators to keep things quiet and secure.
Test Drive: Monitor Performance
Take your car for a short drive on local roads and highways. Pay attention to any unusual noises, drops in power, or warning lights on your dashboard. A properly installed performance exhaust should deliver a deeper tone without sacrificing smoothness. If you notice sluggish acceleration or excessive noise, retrace your steps—there might be a loose connection or an alignment issue.
Troubleshooting Tips for American Cars
- If your check engine light comes on after installing the exhaust system, double-check oxygen sensor connections—many modern American vehicles are sensitive to even minor changes in exhaust flow.
- For trucks and muscle cars (like Mustangs or Silverados), ensure no part of the system is close to plastic fuel lines or brake cables—heat from performance systems can cause damage over time.
- If you encounter persistent leaks at joints, consider using high-temp exhaust sealant along with new gaskets for an extra-tight fit.
Final Check
After driving for a few days, re-inspect all bolts and clamps—they can loosen up after heat cycles. A little extra attention now saves headaches down the road and ensures your new exhaust gives you maximum performance with that classic American rumble!
7. Test Drive and Final Thoughts
What to Look and Listen for During Your First Drive
After installing your performance exhaust system, it’s time for the real test—the first drive. Start by idling your car and listening closely for any unusual sounds like rattles, hissing, or loud leaks, which could signal loose connections or gaps in the system. Gradually accelerate and pay attention to how the car feels: the throttle response should be smooth, and you might notice a deeper or more aggressive exhaust note. As you drive, check for vibrations or clunking noises under acceleration, braking, or cornering; these can indicate parts of the exhaust are making contact with the chassis or other components.
Check Engine Lights and Performance
Keep an eye on your dashboard for any warning lights—especially the check engine light. Some vehicles may require an ECU reset or a tune after a new exhaust install to ensure optimal performance and to prevent error codes. If your car doesn’t feel right or you hear persistent odd noises, stop and inspect your installation before continuing.
Maintenance Tips for Your New Exhaust
To keep your performance exhaust system running strong, make regular inspections part of your maintenance routine. Check hangers, clamps, and gaskets for tightness every few months. Clean off road salt or grime if you live in a snowy area to prevent corrosion. Stainless steel systems need less care but still benefit from occasional cleaning.
Staying Street Legal: Local Regulations Matter
Before hitting the road, double-check that your new setup meets local noise and emissions regulations. Some states have strict laws about decibel levels and catalytic converters—fines can be hefty if you’re not compliant. If you’re unsure, consult your state’s DMV website or ask a trusted local mechanic. Remember, responsible upgrades mean enjoying better performance without sacrificing legal peace of mind.
Your new performance exhaust system should now be ready to deliver improved sound and efficiency! Regular care and attention will ensure it keeps performing at its best—and always stay aware of both local laws and safe driving practices as you enjoy the upgrade.